
Office 365 Autoreply
There are three ways you can setup an autoreply in Office 365:
- Outlook Web Access (via a web browser)
- Outlook
- Phone
With all three methods, the basics are the same and they have the same effect. The automatic replies are handle by the email server itself so once setup, your computer or phone do not have to be on.
Outlook:
- Open Outlook.
- Look on the status bar and make sure “CONNECTED TO: MICROSOFT EXCHANGE” appears.
- In Outlook, click on the File tab (up at the top left).
- Choose “Automatic Replies (Out of Office)”.
- The “Automatic Replies” window will open.
- Choose “Send automatic replies”.
- If you'd like, you can choose to send automatic replies only during specified times. You do this by choosing "Only send during this time range" and then specifying a time range.
- On the "Inside My Organization" tab you should enter the message to be sent to people inside your company.
- On the "Outside My Organization" tab you should enter the message to be sent to people outside your company. If this is the same message, you can just copy and paste it. Note that on this tab you have another option: you can reply to everyone that emails you (including replying to spams), or you can choose to only reply to "My Contacts Only”.
- Press the Ok button when done setting up the automatic replies.
Outlook Web Access:
- Login at portal.microsoftonline.com (use your email address and your email password)
- If you need to, click “Outlook” up at the top of the screen (where it shows “Outlook, Calendar, People,…”).
- In the upper right corner, click the little gear.
- Choose “Set automatic replies”.
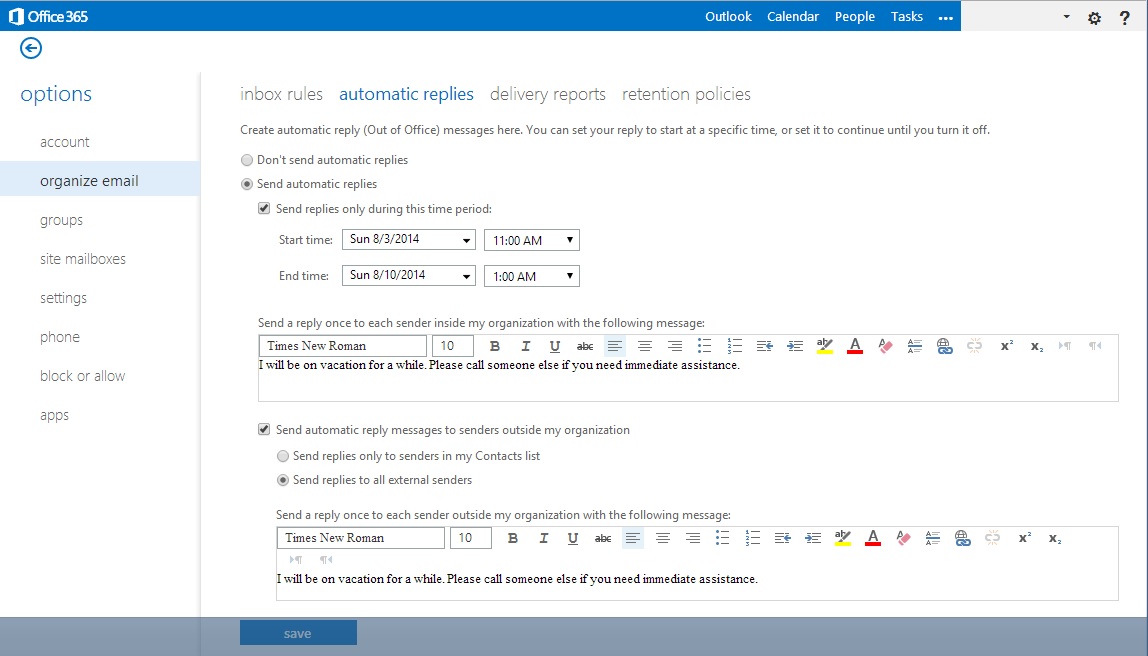
- On the next screen choose the option to “Send automatic replies”.
- There are two replies to complete, one for people within your company, and another for people outside your company.
- If you'd like, you can choose to send automatic replies only during specified times. You do this by choosing "Send replies only during this time period" and then specifying a time range. You might want to do this so you don’t have to come back here to turn it off.
- You can further restrict the replies to “people outside your company” to only those in your contacts list.
Here is a screen shot of what I've described (note; the message shown below is only an example):
Phone:
On my current Adroid phone I can setup Autoreplies like this:
- Open the email app
- Click the menu button (3 veritcal dots).
- Choose "Out of the office".
- On the next screen there is a button called "In the office" - press it.
- Now choose "Out of the office".
- Now a form appears:
- Choose the start date/time & end date/time.
- Enter the messages to send to people in the organization and outside the organization.
- When done with the form, press "Save".